
Inside My Video Editing Process for Better Results
While researching the Sony A6700 back in 2024 I was impressed with the camera’s video capability. After purchasing it, I was even more impressed by the video quality, the Sony A6700 proves to be an excellent hybrid camera for both photo and video. I’ve shot a few short form videos in the past, so I’m now learning to shoot in SLog3 while also expanding my understanding of video editing to get the most out of the footage. After completing a number of online courses such as: - A Diploma in Video Production and Editing and A Video Editing Course. As I use Adobe Premiere for video editing, I also completed several LinkedIn Learning courses focused on Adobe Premiere to improve my skills.
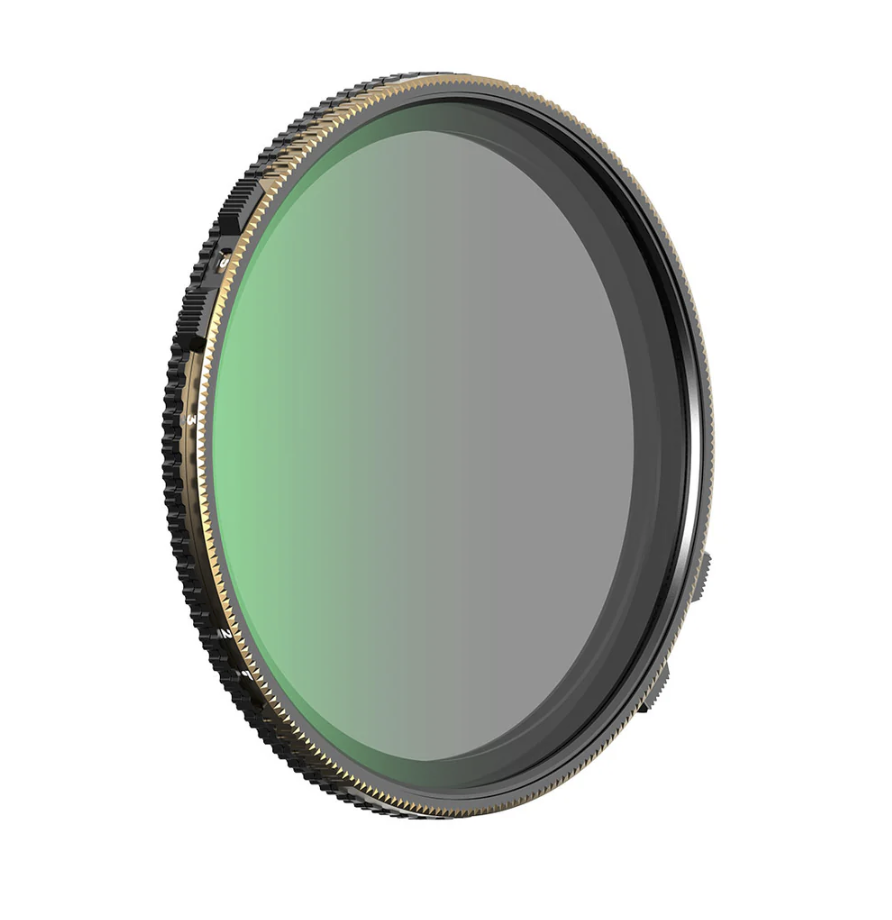
I have always wanted to start out by making a short two to three minute movie. That way I could get a good understanding of how to make clips transition smoothly and also improve my colour grading skills. Living in a vineyard gave me a perfect chance to shoot footage during the harvest in early March 2026. One thing that had been limiting me was that, to achieve proper exposure, I had been relying on a 3 stop neutral density filter, after doing some research I discovered that using a variable neutral density filter is a better way to obtain more accurate exposure control. A ND (Neutral Density) filter acts like sunglasses for a camera, reducing the amount of light entering the lens without changing the colour of the scene .
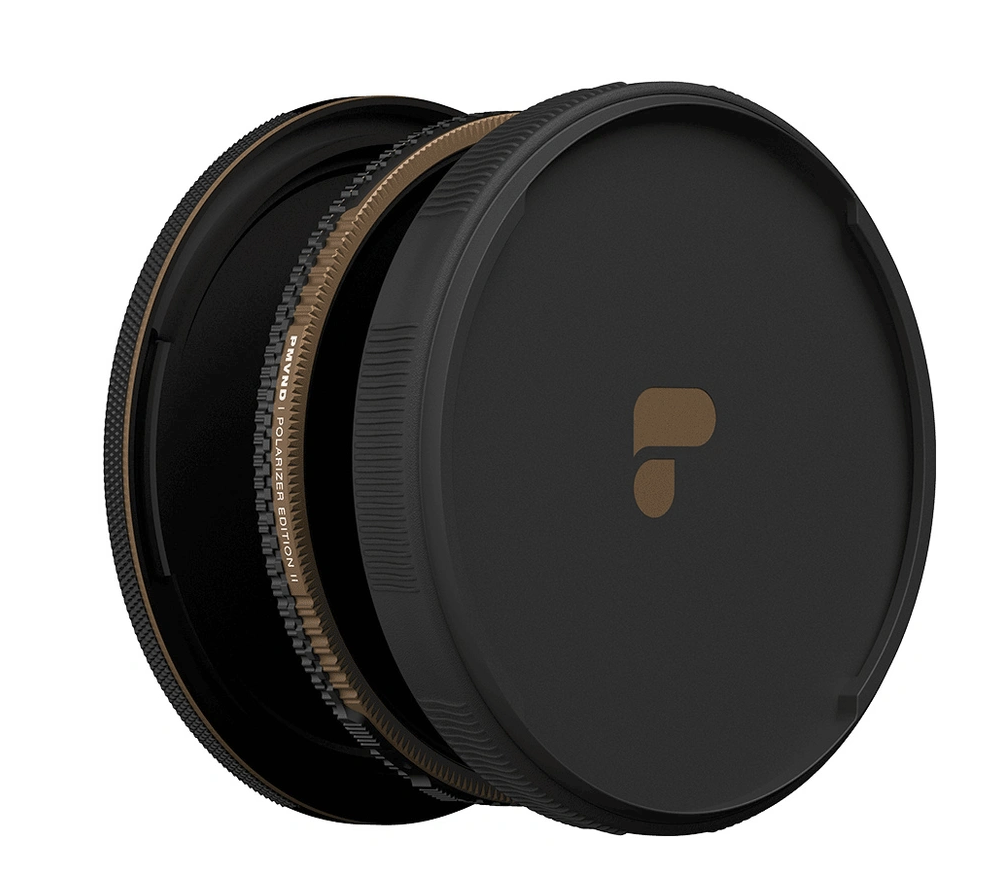
I ended up purchasing the Polar Pro Chroma 2–5 stop variable neutral density filter, which also incorporates a polarising filter. Polar Pro collaborated with Peter McKinnon to produce this innovative filter design, and the combination helps reduce glare and reflections while also allowing much slower more cinematic shutter speeds. I felt this filter would perform well for both photo and video work, and the first time I used it on video was during the grape harvest.
On the day I shot a varied amount of different footage, and a few days later I assembled a rough sequence in Adobe Premiere. In reality the grape harvest intervened, I was working twelve hour shifts, six days on with one day off. So I decided to leave the remainder of the editing until the twelve hour shifts were finished.
Five weeks later I was then able to revisit the video, especially with a fresh set of eyes. The initial video was three minutes and thirty seconds long and I managed to reduce it to two minutes and forty seconds. One useful lesson I learned in Adobe Premiere was to categorise clips and other layers into clearly labelled and colour coded bins, organising everything this way made the editing process much easier to navigate.
Currently I apply LUTs to the footage as well as basic corrections such as exposure and contrast. A LUT (Look-Up Table) is a useful tool in video editing that functions like a colour grading preset, automatically transforming specific colour values in footage to achieve a desired, cinematic look or to convert between colour spaces for consistent, professional results. As my video colour grading improves, I will begin saving my own edits as LUTs, so I can apply these LUTs to future footage.
I’ve previously applied text to video, and I felt a simple title at the beginning of the video was necessary, by adding keyframes to the text layer, the title can smoothly transition in and out of the first clip. Having good audio or music in a video is also very important for setting tone and maintaining viewer engagement. Inside Adobe Premiere you can access music from Adobe Stock, and I currently use the free music section. As I produce more videos I would consider moving to a paid Adobe Stock subscription. Using music from Adobe Stock means I am properly licensing the audio track, which is crucial because using unlicensed music can lead to a copyright strike.
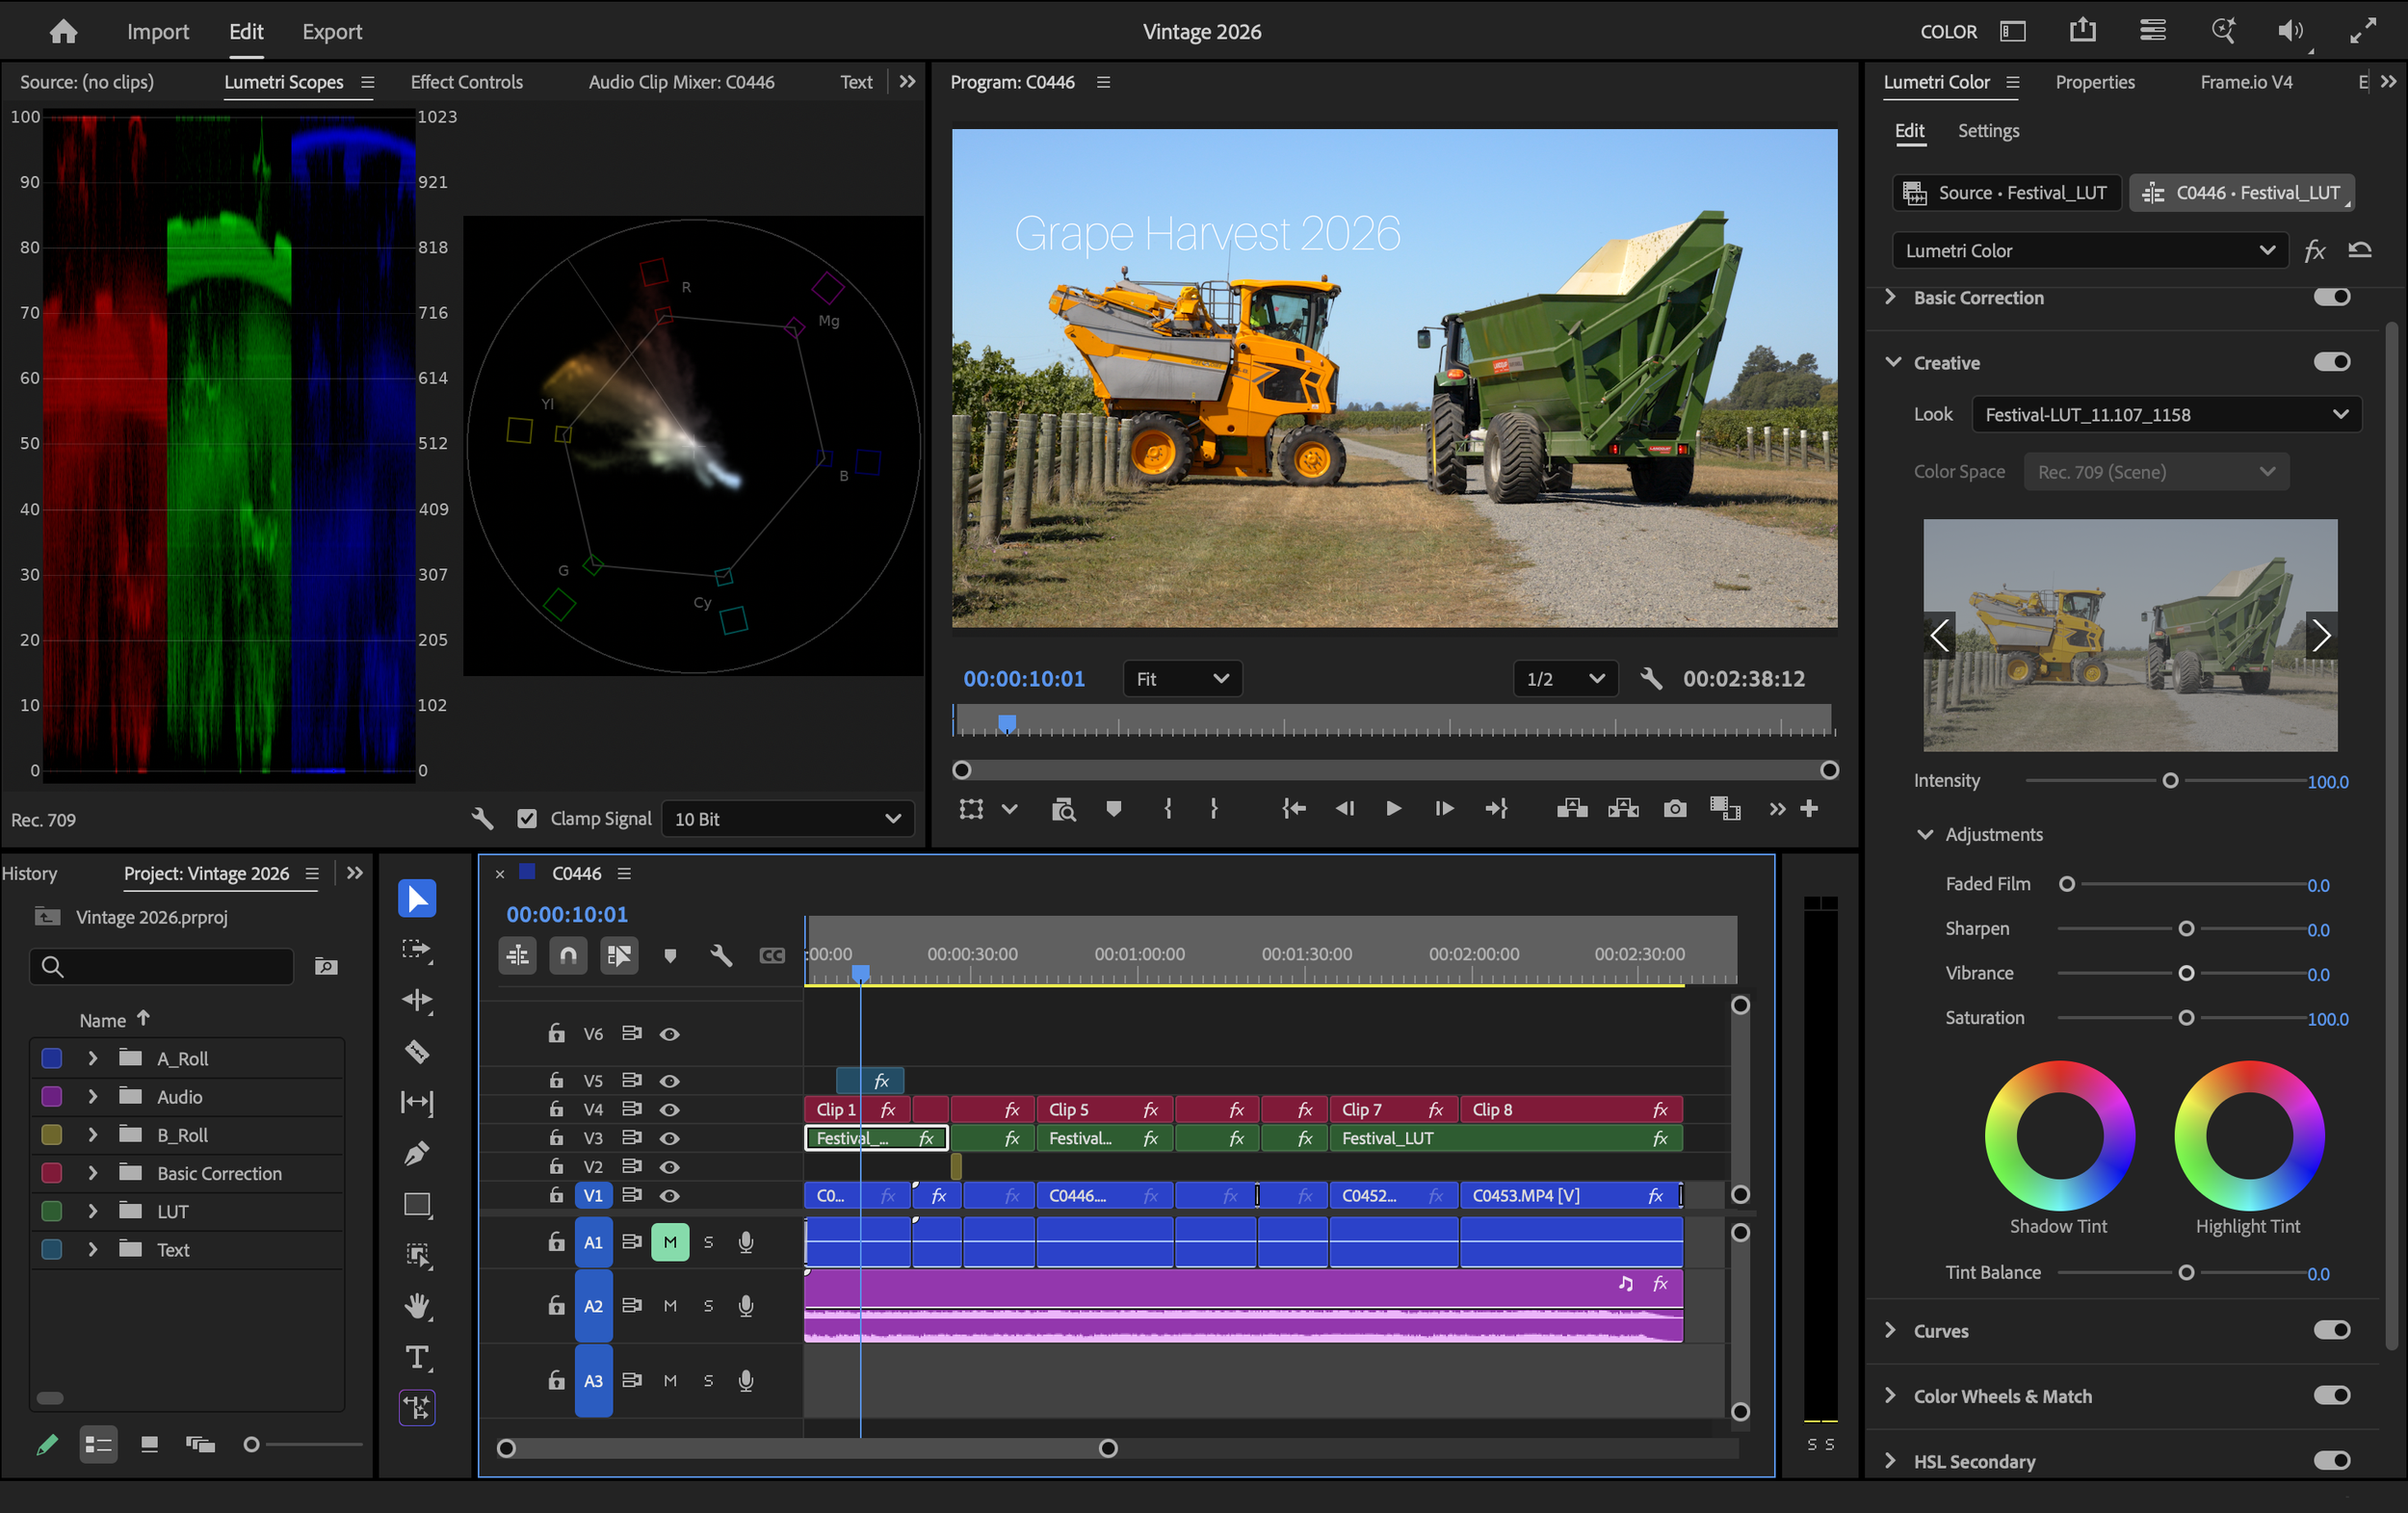
A screenshot of the timeline of the finished video in Adobe Premiere
Below is the final version of the video that I uploaded to my YouTube channel. I designed the YouTube thumbnail in Adobe Express, using one of the many ready made templates available.
I really enjoy creating videos, there’s been a lot to learn, and I will continue to learn as I produce more content. Even though video editing can be quite time consuming, it took me about five hours to fully edit this video. I find the process rewarding and worth the effort.